Preparing your 3D printed props (Part 1)
Introduction
One of the benefits of working with 3D printed props is the fact that you can produce a high-quality finish using some basic techniques. volpinprops is a great example of what’s possible. Henchmen studios and Married Makers are also producers of some high quality props. Henchmen does a lot of resin casting, Volpin does about 70/30 casting to working just with 3D printed props, and MM does most of their work directly with the 3D printed product. Let’s get into some of the techniques they use.
SAFETY
Please wear respirators and proper eye protection when working with some of the mentioned products. No one wants to breathe in VOCs or get epoxy in their eye.
Surface Preparation
It doesn’t really mater if you print at .1 or .2 layer height unless you need some super detailed parts. At that point, it might be better to either use SLA printing or craft the details by hand. For the remainder of the 3D printed product, there are two steps which you will have to repeat.
Fill.
Sand.

Fill
This is the process of filling in the gaps of your 3D print layer lines. There are a few options to work with:
- XTC-3D
- Automotive filler primer
- Bondo
- Acrylic putty
- Baking soda + THIN super glue
- Acetone bath
Let’s talk about each of these in some more detail.
XTC-3D
XTC-3D is a type of epoxy that you cover your print with. When the epoxy cures, you have a hard, resilient coating that completely fills most layer lines. One huge downside of this approach is that you have very little control on how much the print is smoothed. The epoxy is typically spread via a popsicle stick and there’s not a typical “working time” where you have some time to make adjustments to the surface. Once the epoxy is on, you’re better off just leaving it as-is and sanding it down later. Along with providing a super-fast way to smooth prints with little-to-no effort, you lose a lot of details and sharp edges. it may be good for large, convex surfaces, but for detailed work, it’s not an option.
Automotive filler primer
This is basically paint primer that comes in a can and has a very thick and airy consistency when sprayed. When dry, it settles down to a thinner coat, but it’s very easy to apply too much in one area. Luckily, unlike regular spray paint, we can always sand it down. The obvious downside is that you’ll end up going through more sandpaper.
When most people mention “filler primer”, they mean the automotive stuff that comes out of the can. It’s relatively cheap and gives you amazing control over the end product. Combined with multiple passes, sanding with increasing grits, and patience, you can achieve an amazingly smooth surface (See some of volpinprops’ work!).
The downside of this approach is the time and physical work of sanding involved. You’ll need lots of sand paper and an area to spray paint. You’ll get creative with sanding solutions, like gluing thin strips of sandpaper to popsicle sticks to make small sanding sticks, or rolling up small pieces of sandpaper into flexible strips for sanding inner curved surfaces. Don’t let the sheer amount of work dissuade you however, as the labor of fill/sand/fill/sand/ad infinitum can seriously upgrade the quality of the final product.
Bondo
Bondo is technically an automotive body filler, typically sold in metal cans as a two-part solution that is mixed together prior to application. Bondo is applied as a light-weight paste for small to medium imperfections. It’s spackle, but for cars.
When someone says “bondo”, they likely mean this stuff. It comes pre-mixed, has a thicker consistency, but is much easier to manage as you don’t have to worry about preparing too much of the two-part bondo. Both products dry into an extremely easily sandable product, and as such, should be applied towards the end of the finishing stages. Automotive filler, bondo, and sanding will get you a long way in terms of quality.
Acrylic putty
It’s basically the same as bondo, but cheaper. Punished Props likes to include this on their part list instead of bondo – and since I trust them despite not having used it myself – I’ll include it here.
Baking soda + THIN super glue
This combination of products provides a strong, quick-setting filler. Bondo is NOT good for filling joints – it’s mainly a scratch and surface prep paste and has little to no structural strength. In order to use this combo, you need to pack as much baking soda into the joint or gap to make a flush surface. Don’t pack too much at once however – it’s ok to work in chunks. Once you have the baking soda in the gap, apply a small amount of THIN super glue and it will rapidly spread through the baking soda and harden in seconds. When I say thin, I mean water-consistency thin.
The finished “resin” is easy to sand and is as durable as you’d expect from super glue. Credit to Bill from Punished Props as he’s the first person I’ve heard of this technique from.
Acetone bath
Acetone baths are primarily only for ABS prints – which you should be printing in anyways. (In addition to the previous link, ABS is easier to sand than PLA. PETG is also a good option instead of ABS as it’s also a high-temp thermoplastic.) There are two application methods for the acetone bath – applying the acetone directly onto the print, or soaking the acetone into a medium (tissue paper/paper towel) and then enclosing both the print and the medium in a small space, like a cup. Since acetone smoothing smooths all surfaces, it leaves the print less detailed, just like XTC-3D. This is not a technique I recommend as you lose a lot of control over the finished product.
Sand
I recommend sanding with the following:
- regular sandpaper (grits 60, 80)
- wetsand sandpaper (grits 200, 400, 800+)
- files
- orbital sander + earplugs
- popsicle sticks + glue (for makeshift sanding sticks)
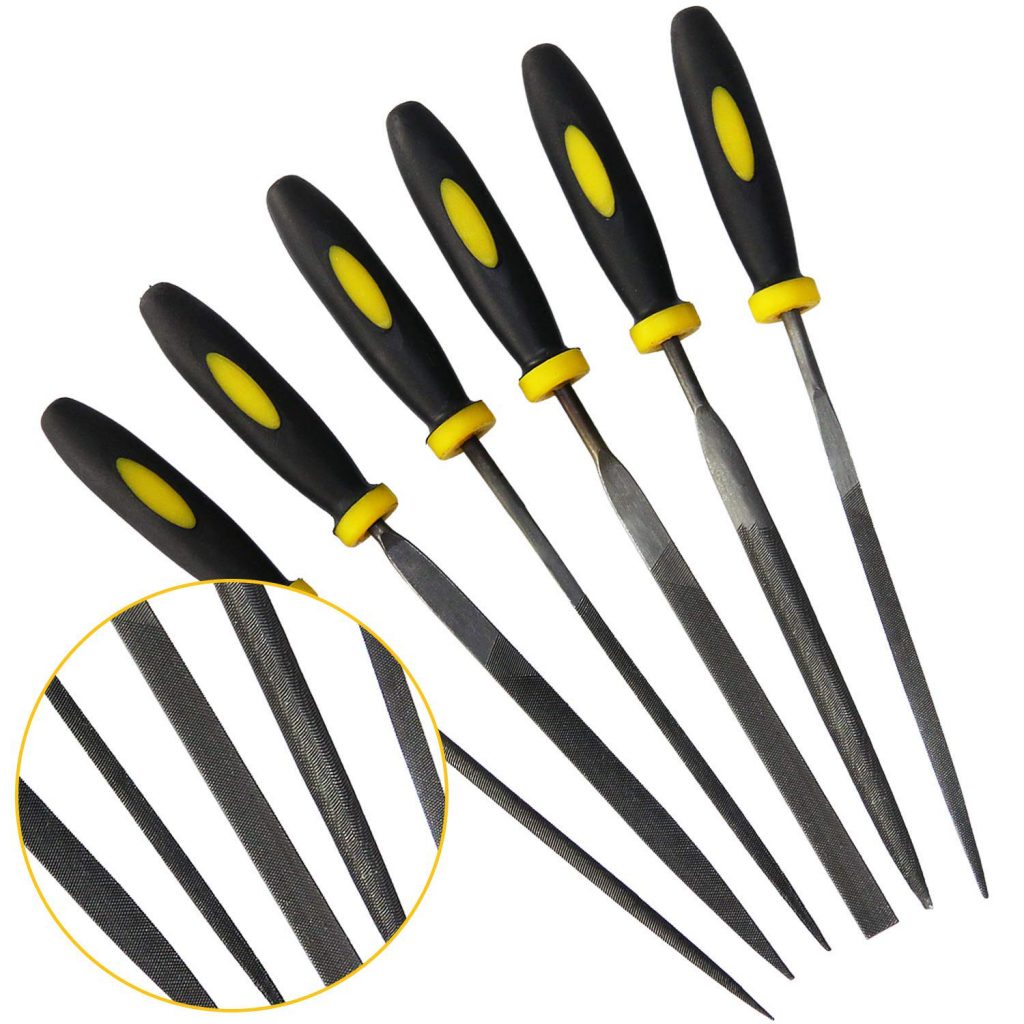
I really like using these two files:
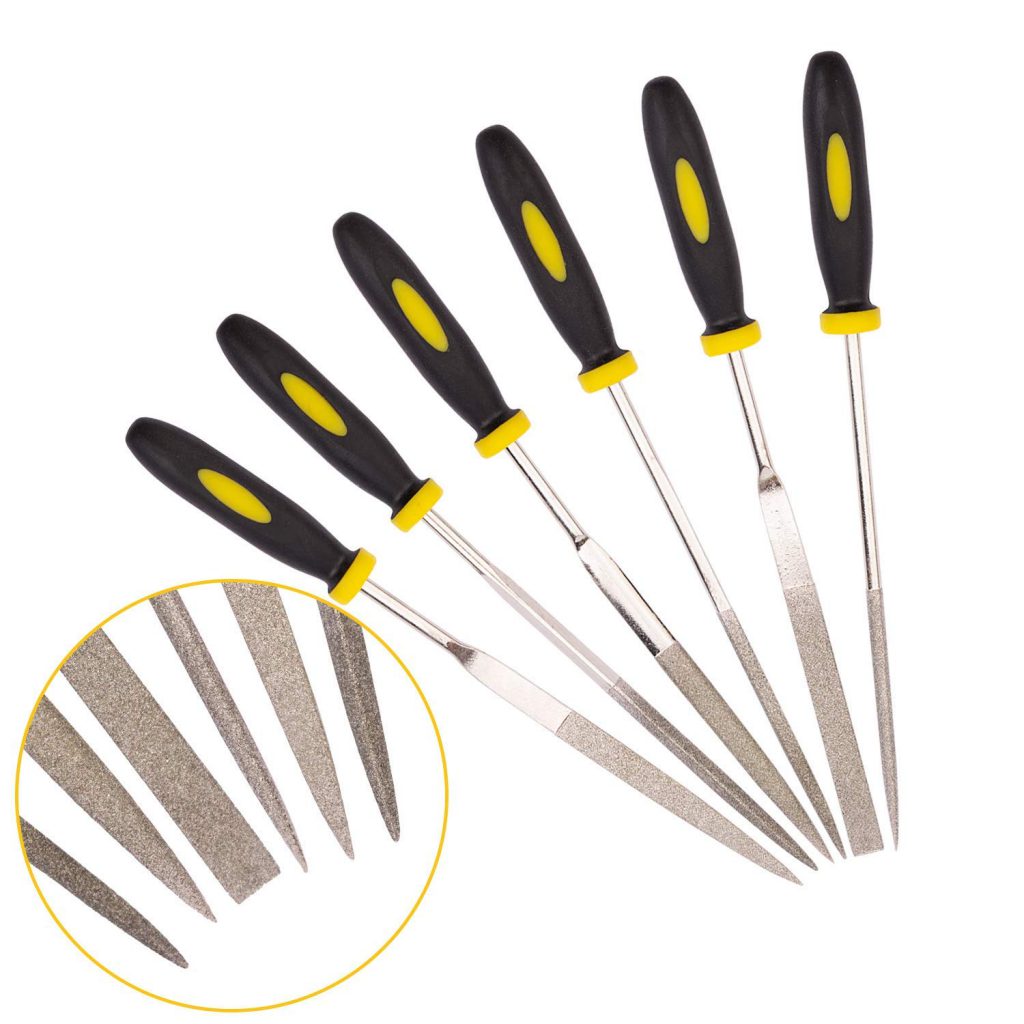
When choosing a small file set, you will want to make sure the files are actually sliced, and not a diamond file. A diamond file will not sand effectively with 3D filament and get clogged quickly.
Left = good, right = diamond cut
An orbital sander is well worth the investment if you find yourself working with large, flat surfaces, or even convex surfaces. After using it a few times, you’ll start to want using it as often as possible!
Final comments
It’s almost always worth it to spend the time with the following:
- sand a finished print with 60 grit sandpaper
- spray it with filler primer
- sand again at 220
- spray a second, thinner layer of filler primer
- sand at 400
- apply bondo
- sand at 800+
You can always skip the last 2 steps if you don’t feel the need to use bondo. Preparing your print in with these steps will add another 2-4 hours of working time and likely 1-2 days more total time. I usually wait 12 hours for my print to dry before sanding, and at least 6 hours after I wetsand to apply the next coat, so the total time adds up when working with multiple coats.
There are sneaky workarounds to certain applications – I’ve seen people lasercut sintra for flat areas, configure their 3D model to have deeper details, and fill in those same details with a piece of sintra. This reduces the need to sand difficult-to-reach interior surfaces and can (potentially) drastically reduce total working time, depending on what the shape is.

